Hey there! As a supplier of microwave oven mounts, I often get asked about the installation process. It's a topic that might seem a bit daunting at first, but don't worry, I'm here to break it down for you in a simple and easy - to - understand way.
1. Gather Your Tools and Materials
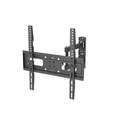
Before you start the installation, you need to make sure you have all the necessary tools and materials. You'll typically need a drill, a level, a screwdriver, measuring tape, and of course, the microwave oven mount itself. If you're looking for a great option, check out our Universal Microwave Oven Mount. It's a top - notch product that's designed to fit a wide range of microwave ovens.
You should also have some wall anchors if you're mounting the oven on drywall. Wall anchors help distribute the weight of the microwave evenly and prevent it from pulling out of the wall. And don't forget to have your microwave oven handy so you can double - check the measurements and make sure everything fits properly.
2. Choose the Right Location
Picking the right spot for your microwave oven is crucial. First of all, you need to make sure there's enough space. Measure the dimensions of your microwave and add a few extra inches for ventilation. A well - ventilated microwave will run more efficiently and last longer.
The location should also be at a comfortable height. You don't want to strain your back every time you use the microwave. A good rule of thumb is to mount it at eye - level or slightly below. Also, make sure the area is near an electrical outlet. You don't want to deal with long, messy extension cords.
3. Mark the Mounting Holes
Once you've chosen the location, it's time to mark the mounting holes. Hold the microwave oven mount against the wall where you want to install it. Use a level to make sure it's perfectly straight. This step is super important because if the mount isn't level, your microwave will be tilted, which can be both unsightly and potentially dangerous.
After ensuring the mount is level, use a pencil to mark the locations of the mounting holes on the wall. Double - check your marks to make sure they're in the right places. If you're using our Universal Steel Microwave Oven Mount, it comes with clear instructions on where to mark the holes based on the size of your microwave.
4. Drill the Holes
Now it's time to drill the holes. If you're mounting on drywall, insert the wall anchors into the holes after drilling. This will provide extra support. For a solid wall like brick or concrete, you might need to use a masonry bit.
Be careful when drilling. Make sure you drill straight and don't apply too much pressure. If you're not confident in your drilling skills, it might be a good idea to ask someone with more experience to help you out.
5. Attach the Mount to the Wall
Once the holes are drilled and the wall anchors are in place (if needed), it's time to attach the mount to the wall. Line up the holes in the mount with the holes you drilled in the wall. Then, use the screws provided with the mount to secure it to the wall. Tighten the screws firmly, but don't over - tighten them as this could damage the wall or the mount.
6. Install the Microwave on the Mount
With the mount securely attached to the wall, it's time to install the microwave. This usually involves sliding the microwave onto the mount. Some mounts have a locking mechanism to keep the microwave in place. Make sure you follow the instructions carefully to ensure the microwave is properly installed.
If you're using our Universal Microwave Shelf Bracket Wall Mount Kit, it has a user - friendly design that makes it easy to install the microwave. Just slide it onto the brackets and lock it in place.
7. Check for Stability
After installing the microwave, give it a gentle shake to check for stability. If it wobbles or feels loose, double - check the screws and the mount to make sure everything is tightened properly. You don't want a wobbly microwave, as it could fall and cause damage or injury.


8. Plug in and Test
Once you're satisfied with the stability, plug in the microwave and test it. Set it for a short period, like 30 seconds, and see if it heats up properly. If everything works as it should, congratulations! You've successfully installed your microwave oven mount.
Why Choose Our Microwave Oven Mounts?
We take pride in offering high - quality microwave oven mounts. Our products are made from durable materials that can withstand the weight of most microwaves. They're also designed with ease of installation in mind. Whether you're a DIY enthusiast or a professional installer, you'll find our mounts easy to work with.
Our universal mounts are compatible with a wide range of microwave oven models, so you don't have to worry about whether it will fit your specific microwave. And we offer excellent customer support. If you have any questions during the installation process or about our products in general, our team is always ready to help.
Contact Us for Purchasing
If you're interested in purchasing a microwave oven mount, we'd love to hear from you. We offer competitive prices and fast shipping. Whether you're a homeowner looking to upgrade your kitchen or a contractor working on a big project, we have the right mount for you. Just reach out to us, and we can discuss your specific needs and help you find the perfect mount for your microwave.
References
- General knowledge from years of experience in the microwave oven mount industry.
- Product manuals of our microwave oven mounts.